Spooky season is upon us! And in 2021, pumpkin carving is old news.
‘Pumpkin art’ garners 3.7 million views on TikTok, as a trend rises for embellishing the humble vegetable with unusual materials like tissue paper, paint and even nail varnish. No longer are pumpkins a novelty, but chic ornaments to complement the home.
Intrigued? To celebrate Halloween and get the whole family crafting, we have five creepily creative ways to decorate a pumpkin:
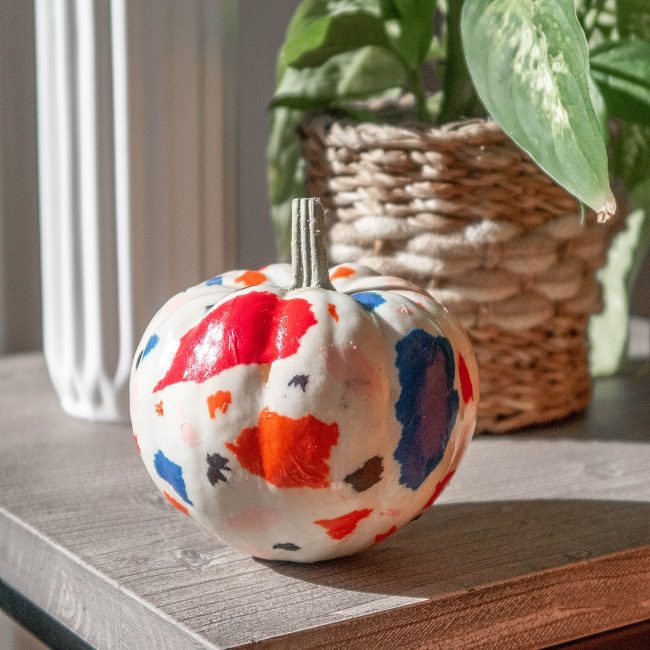
Terrazzo tissue pumpkin
Recreate this Italian-inspired pumpkin decoration using just tissue paper and glue:

What you will need:
- Ghost pumpkin (or spray paint a pumpkin white)
- Coloured tissue paper
- Craft glue
- Paintbrush for glue
Instructions:
- Tear up the tissue paper into an assortment of sizes
- Using a paint brush, apply a thin layer of glue over the entire pumpkin
- Stick pieces of tissue onto the pumpkin and smooth down
- Use the paint brush to add another thin layer of glue over the pumpkin
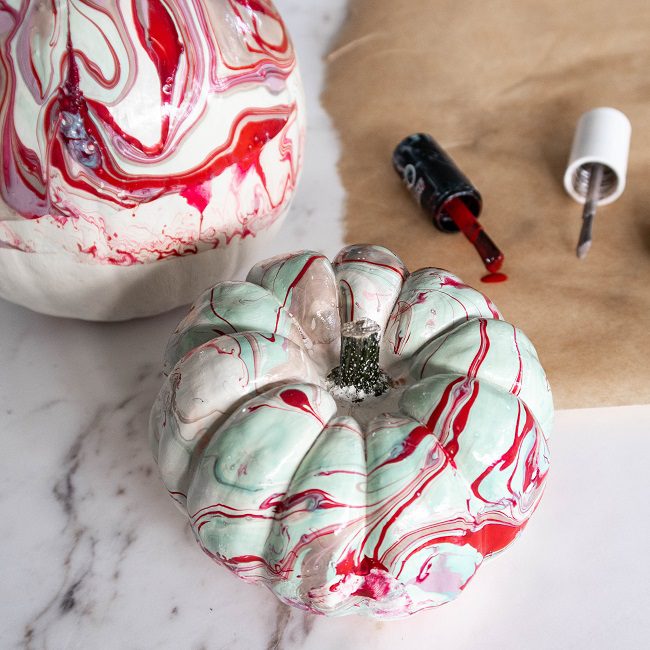
Marbled nail polish pumpkin
Add art-deco to your freakishly fun festivities with super-simple marbling:
What you will need:
- Ghost pumpkin (or spray paint pumpkin white)
- Nail polish
- Bowl of lukewarm water
- Toothpick
- Optional: nail polish remover and cotton balls for clean-up
Instructions:
- Drizzle nail polish colours into the bowl of lukewarm water
- Use the toothpick to swirl the colours around to create a marbling effect (note: do these steps quickly - a minute or less - so that the polish doesn’t set)
- Hold the bottom of the pumpkin and dip it into the water. The nail polish will cling to the pumpkin!
Clean-up tip: pour nail polish remover into the bottom of the bowl and use cotton balls to wipe up the nail polish. You can also use it to clean any stained fingers.
Glitter pumpkin
If in doubt, just add (ghoulish) glitter with these sparkly pumpkins:

What you will need:
- Pumpkin
- Craft glue
- Paint brush for glue
- Glitter
Instructions:
- Use the paint brush to apply glue to the areas of the pumpkin where you’d like glitter to sit
- While the glue is still wet, shake the glitter onto the glue areas until it covers the area fully
Clean-up tip: apply glitter over a large sheet of normal or wax paper to catch the excess. Once the pumpkin has dried, shake it off and fold the paper so that the excess glitter falls to the middle and can be poured back into the container.
Crayon melt pumpkin
It’s time to raid the kids’ crafting materials to create this eye-catching pumpkin design:

What you will need:
- Pumpkin (you can spray paint it white if you want a more dramatic look)
- Crayons
- Hair dyer
- Any type of glue
Instructions:
- Remove the wrappers off the crayons you intend to use and snap them in half
- Dip the bottom of each crayon piece in glue and place it on top of the pumpkin, branching out from the stem
- Repeat with as many crayon pieces as you like until they fully surround the stem
- Leave until the glue has dried and the crayons stay in place
- Turn hairdryer on to the hottest but slowest setting (if it’s too high-powered then wax droplets will blow everywhere!)
- Keep the hairdryer about 30cm from the top of the pumpkin and hold straight down so the hot air slowly starts melting the crayons
- Once the crayons start melting, you can use the hair dryer to guide the streams of wax
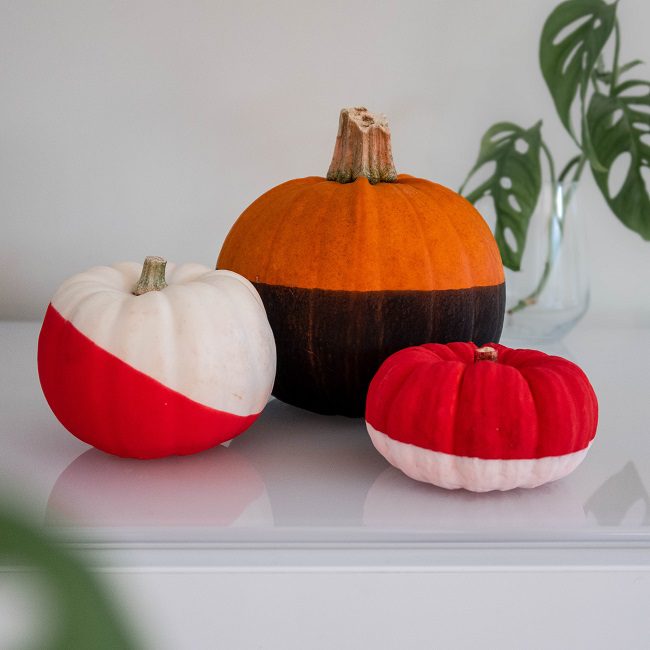
Colour block pumpkins
Blend your pumpkins with your home or garden’s colour scheme with these block-painted pumpkins:
What you will need:
- Pumpkin
- Runny acrylic craft paint
- Wax paper
- Bowl (large enough for pumpkin to fit inside)
Instructions:
- Fill the bowl halfway with your desired paint colour
- Hold the stem of the pumpkin and dip it into the bowl of paint
- Pull it back up and let the remaining paint drip back into the bowl.
- Place it on wax paper to dry
- If you want to have multiple colours, dip it in a different colour once it has fully dried
Clean-up tip: clean the bowl quickly if you don’t want to ruin it with dried paint. Use a funnel to pour the leftover paint back into the container then wash out with soapy water.
Latest Blogs

Stannah named Which? Recommended Provider for stairlifts for the fourth consecutive year!

What does “good design” really mean in the home?

Stannah are at The Ideal Home Show with Uplifts homelifts and Joya stairlift
Whole Home Comfort with Stannah and HSL

Dame Zandra Rhodes x Stannah: When accessibility meets style

Could more people benefit from home adaptation support for hidden disabilities?

50 years of Stannah Stairlifts – A milestone grounded in purpose